

Wednesday, December 31, 2014
Thursday, August 28, 2014
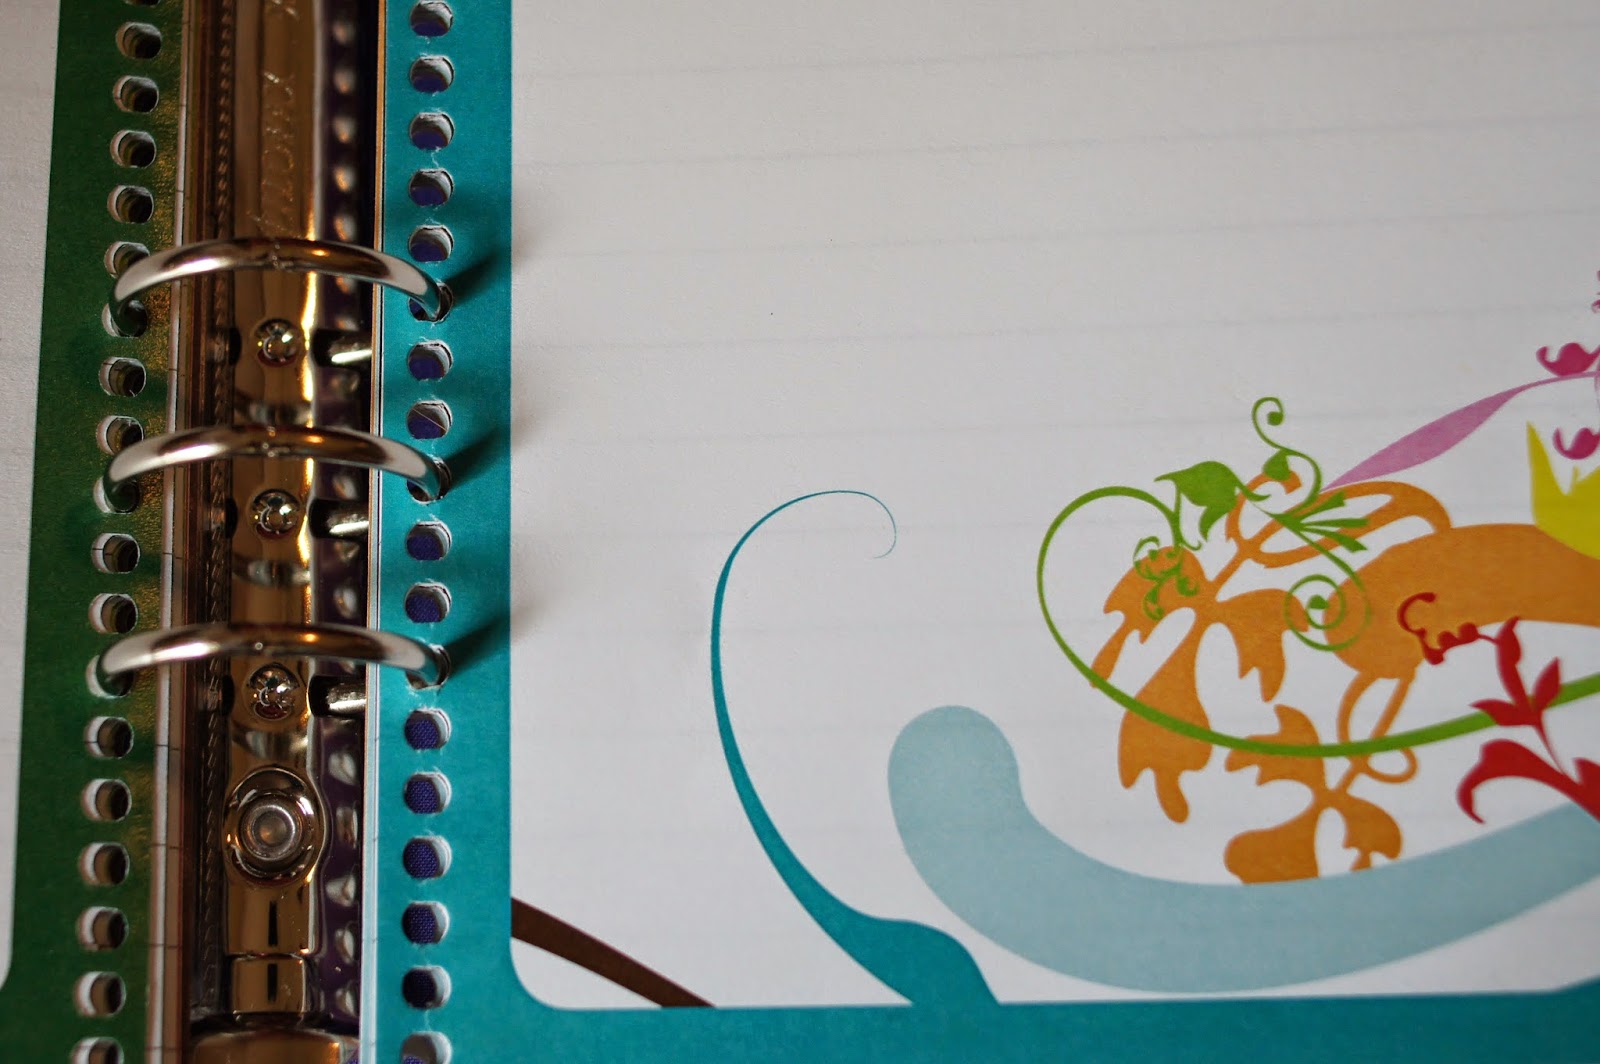
Erin Condren Life Planner Arc Disc Punched

I arc'd my Erin Condren life planner today. I have several arc planners for homeschool, budget, Disney etc so the arc system is not new to me. I love the arc system it is easy to use, versatile and works for just about everything. I was not sure if I was going to arc the life planner or not but when the new interchangeable cover started popping off almost every time I closed it because it was getting bulky in August I knew I needed to do something. Arc was an easy choice since I already had the punch. I did think about putting in a Filofax like my business planner but I like being able to fold the planner all the way over.
Here are a few pictures of how I arc'd my planner.

Supplies
1. Life Planner
2. Arc Discs
3. Paper Trimmer
4. Arc Punch ( the levenger punch will work also)

I used 1.5" Arc discs I cut the dots using vinyl with my Silhouette.


I used vinyl I already had and the colors matched pretty well.

I uncoiled the planner. It is easy unbend one end of the coil straight and unwind it through.
.jpg)
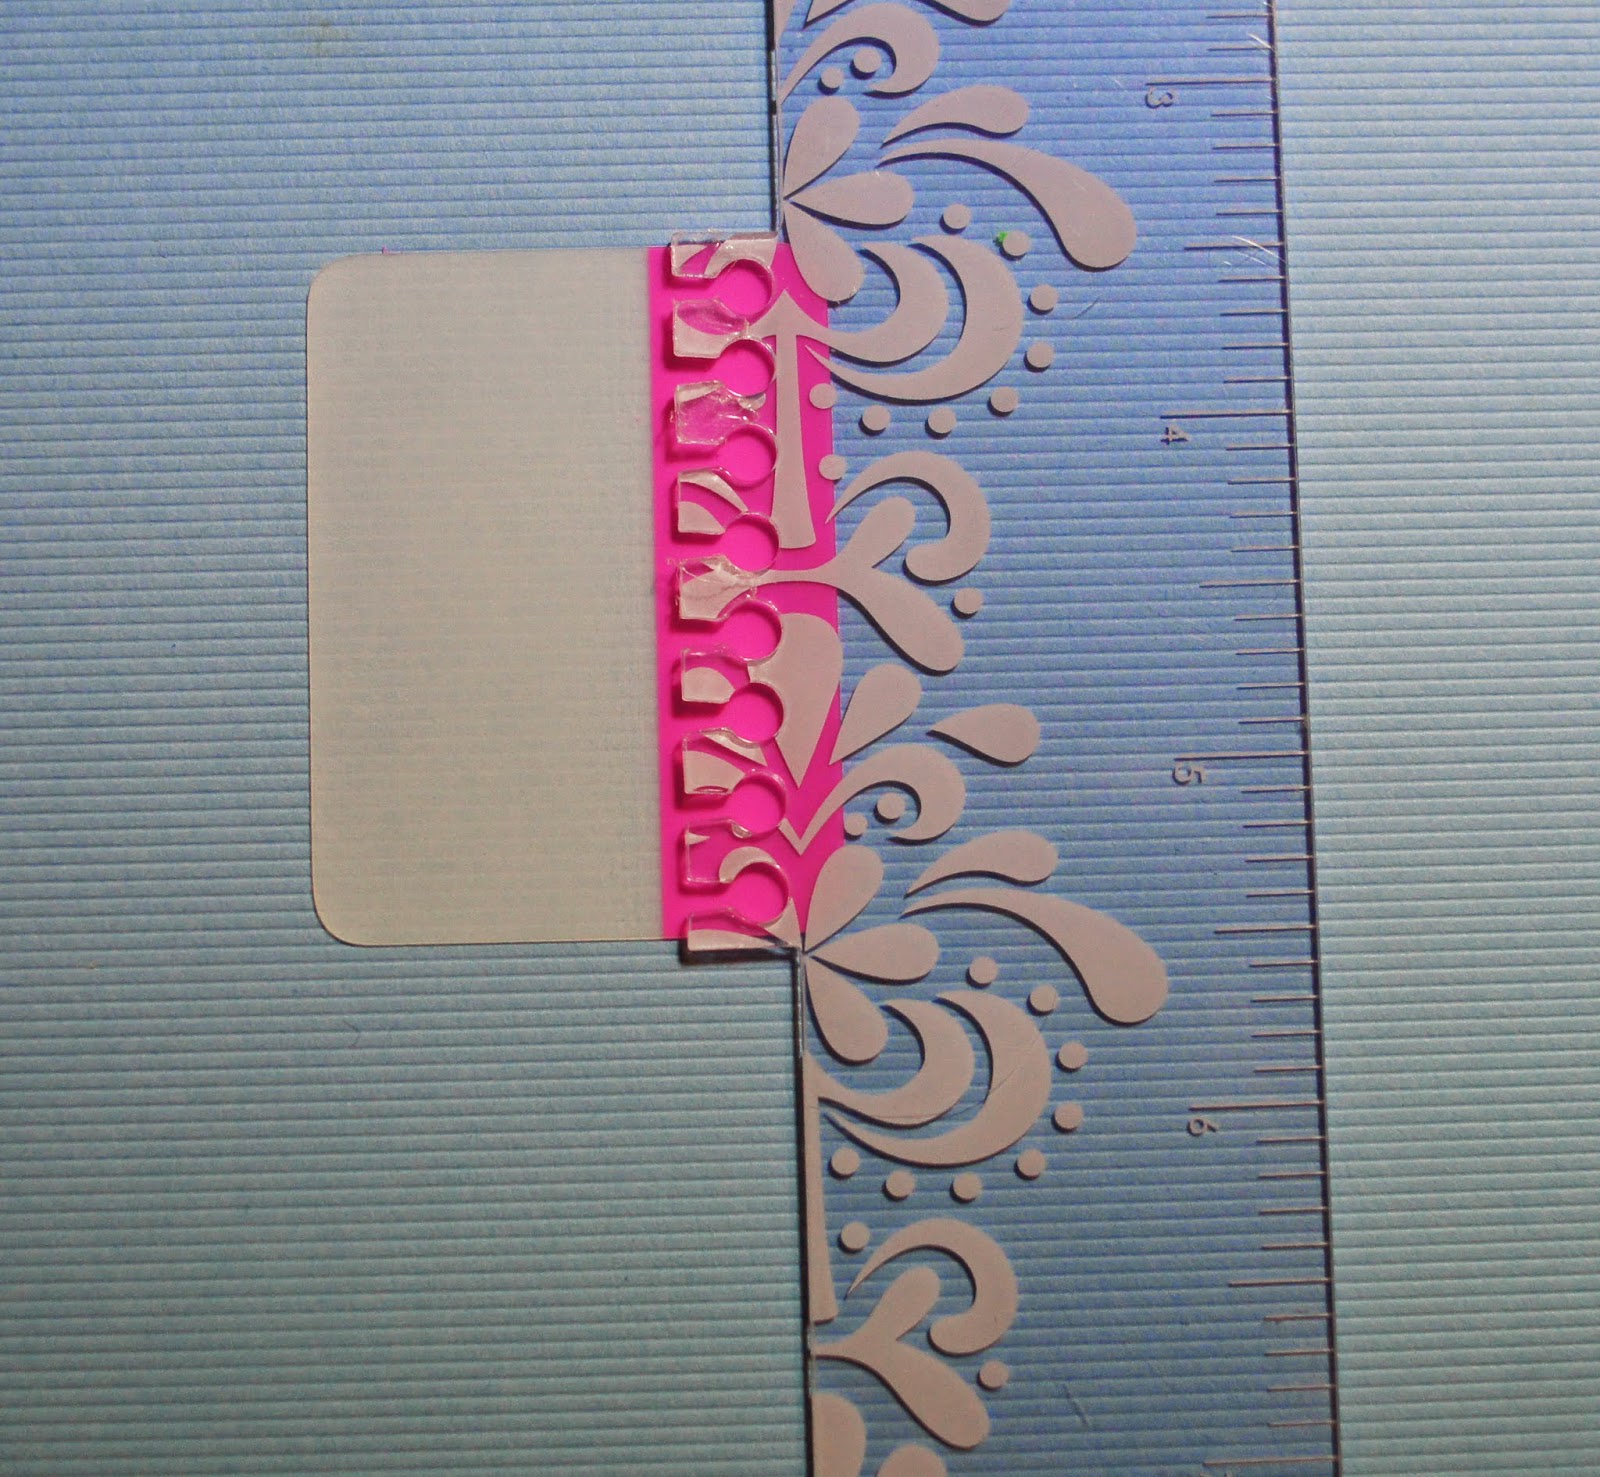
Next I trimmed the paper just enough to remove the edge. I made a line with washi tape on my trimmer so all the paper was cut in the same place all I had to do was line the paper up to the washi tape and trim.
Next it was time to punch this was the hardest part since the planner pages are a little odd size larger than a typical a5 or junior size but smaller than full size it took a little trial and error to find the exact place to put the stop on the punch. Once that was done it took no time at all to punch. I did not think to take a picture here. I would test a practice page or two until you get your stop on the punch set just right.

As you can see you don't loose much space when trimming and punching it is not enough to bother me.

It took less than an hour and I have more space to add additional pages, inserts, etc. and I love the polka dots discs.

Here are my two life planners: my arc health and fitness and my Filofax Finsbury in electric blue business planner.
Saturday, August 16, 2014
My Silhouette Cutting Station Worktable
I sold off all of my Cricut cartridges and machine in order to buy a Silhouette. I am so happy I did the Silhouette does so much more then the Cricut Expression I had. I needed a good place to work with the Silhouette and connect it to my computer.
I tried using a plastic roll cart and that was not sturdy enough for the silhouette and supplies. We looked at building a custom cart or buying a separate desk. I wanted something on wheels so I can use the silhouette where I am which during the day is mostly in the living room during homeschool.
My solution was a tool cart from Sears. We used them in my son's room since he wanted a garage style theme and these tool carts can hold a ton of LEGO. I stole an extra one my husband had in the garage and it worked perfectly for my needs. It is large enough to hold and store the Silhouette plus lots of drawer space for supplies, tools, vinyl, cutting mats etc. and it is on wheels.
This is the one we have except in red Craftsman Tool Cart
4 drawer Red Craftsman Tool cart It is 26" wide 18" deep 32" tall
I still need to add vinyl to pretty it up :)
Drawer 1 holds my tools, punches, tape etc
Drawer 2 Has current projects working on
Drawer 3 - transfer tape, cutting mats
Drawer 4 - Stores Silhouette Cameo plus scrap vinyl
The drawer is deep enough to store a Silhouette Cameo, cords and extra
I added a scrap piece of wood to the top for a flat working surface
It is 18" deep which is enough for the mat to freely move behind the silhouette.
Wednesday, August 6, 2014
Filofax Finsbury Electric Blue
She is here! It only took a week from Amazon even though there was a 3 to 5 week wait time. You can see it here
It is a perfect burple (blue and purple) color. Sometimes it looks purple and sometimes it looks cobalt blue depending on the lighting but mostly it is burple. The photos below were with natural light no flash or editing


It is a perfect burple (blue and purple) color. Sometimes it looks purple and sometimes it looks cobalt blue depending on the lighting but mostly it is burple. The photos below were with natural light no flash or editing
A5 size
The only thing I don't like about it, it does not lay flat at all but it is very stiff so hopefully over time it will get better.
The inside front a zippered pouch, several card holders and a pen holder.
The back has a place for a notebook and a second pen holder.
The rings are perfect on this one. I had an older Erin Condren notebook with just a few pages left so I uncoiled the plastic spiral and added the note pages. They fit without trimming or punching. I am not sure I will do this with the life planner I have on order. I had planned on having it trimmed and punched at Fedex Office Print. I was there the other day and I asked about how much would it cost, I was told $1.50 to trim and $.01 per page so around $5.00 totally worth my time for that. I can then add my own pages I have designed for home business at home but to get the bulk of the pages done quickly would be great.
It also came with a complete set of 2015 Filofax calendar, notes etc. I won't be using it I may use it to set up a planner for my husband just not sure yet.
Monday, August 4, 2014
Glitter Stickers
I made glitter teardrop stickers today, they are so pretty and sparkly. I wasn't sure how well glitter paper would cut on the silhouette but with the right settings it did great. I run the glitter paper through my xyron first and then cut with the silhouette. I am having so much fun making projects with the silhouette there is so much you can do and I have just started learning.


Green and Silver. The camera just doesn't show the sparkle.
Pink and light blue glitter teardrop stickers.
Here is what they look like in a Erin Condren life planner.
I have a set of 20 stickers available in my etsy store, you will receive 5 of each color. Click below for the link.
Friday, August 1, 2014
My Current Favorite Pens
HAPPY FRIDAY!
I love pens all pens. I have a few favorites that I use in my planners for color coding. I like pens that are fine tip and do not bleed through the paper.
My current favorite pen is the Staedtler 10 Set They write well do not bleed or run out of ink in a week like my Coletto pen does.


I love pens all pens. I have a few favorites that I use in my planners for color coding. I like pens that are fine tip and do not bleed through the paper.
My current favorite pen is the Staedtler 10 Set They write well do not bleed or run out of ink in a week like my Coletto pen does.
My second favorite is the PaperMate Flair Set I have seen these on sale several places with back to school sales.
Here is what I keep on my planner most of the time it is a K&Company Pen Band with Paper Mate Flair pens. I almost always have my Staedtler set with me and those are the ones I use most of the time. The Staedtler pens are a little too skinny to fit and stay in this holder, if you know of a holder that would fit the Erin Condren planner and Staedtler pen be sure and leave a comment I would love to get one.
The Flair pens match the cover perfectly :)
I won't show a picture of my Sharpie collection because they are everywhere the office, the homeschool room, the cart I keep supplies in, purse you get the picture. I believe you can not have too may sharpies.
I have a love of the rose pens I make. In the past before I stopped my wedding favor business when I had my son, I made thousands of these pens for wedding favors, guest books, showers etc.
I am now selling them again in my etsy store.
I make one with a Sharpie fine point pen and one using a ball point pen for favors, parties etc. Click below for the store link. They are custom made to order.
I hand make each pen using satin ribbon and floral tape.
Thursday, July 31, 2014
Filofax
I saw a burple (purple and blue ) Filofax planner which is my favorite color and I fell in love. I looked at for days, I priced it everywhere and I had it sitting in my amazon cart for a few days trying to talk myself out of it. Then amazon lowered the price to $64 and I could not resist anymore I bought it, I had a amazon gift card to use so that helped a lot. I plan on putting my Erin Condren planner in it, I have been watching videos and blogs on the best way to do that.
This is the one I ordered. Electric Blue Filofax


Amazon has several on good deal today there is a 3 to 5 week wait time for stock to become available but at these prices I am OK with that.
They have a A5 Purple Malden which is beautiful. I have a black Malden in pocket size I keep in my purse all the time.


This is the one I ordered. Electric Blue Filofax
Amazon has several on good deal today there is a 3 to 5 week wait time for stock to become available but at these prices I am OK with that.
They have a A5 Purple Malden which is beautiful. I have a black Malden in pocket size I keep in my purse all the time.
I almost bought this A5 Saffino Raspberry $38
I hope putting my Erin Condren in the Filofax will work out as well I think it will. I will be sure and post pictures as soon as it get here. I can't wait.
Tuesday, July 29, 2014
My Erin Condren Health and Fitness Life Planner
I love my Erin Condren planner, I have found so many wonderful ways to customize with groups on facebook and instagram that it has made it the perfect planner for me.


The new quote covers are great and did you know you can order just the covers now so you can interchange them with your mood:) I am hoping there will be holiday covers this year.
I am using my planner mostly as a health and fitness planner. I have been working hard this past year to loose weight and get healthier. I am playing around with the titles of sections to see which one will work best for me. The bottom section I am temporarily using for my store and blog until I get a business planner set up.
Decorating the planner is half the fun and I find it a relaxing way to start the week and it helps keep me motivated and organized.
Here is my referral link for a $10.00 off coupon. Erin Condren Coupon
I post my planner pictures on Instagram
Sunday, July 27, 2014
How to make coil clip for Erin Condren Planner
Today I have a how to make your own coil clips for Erin Condren planners and notebooks. This make a great inexpensive way to pop add ins to your plannner. You can add dashboards, business cards, invitations, extra printables etc.


Next use the 1/8" punch to punch the holes you traced.

After you have your holes punch use your scissors to snip from the edge to the hole.

You can barely see the cut lines but they are there.


It is ready to use now, I use the tip of the pen to help pop the post it in between the coils.
Satin Rose Designs
Supplies Needed :
1. An add on - I am using a dashboard I made
2. Pen
3. Post It Tabs
5. Scissors
6. Erin Condren Bookmark
Line your bookmark over the non sticky part of the post it tab.
Use your pen to trace the inside of the circles on the bookmark.
Next use the 1/8" punch to punch the holes you traced.
After you have your holes punch use your scissors to snip from the edge to the hole.
You can barely see the cut lines but they are there.
You are ready to stick the post it onto your add on.
It is ready to use now, I use the tip of the pen to help pop the post it in between the coils.
Satin Rose Designs
Subscribe to:
Comments (Atom)